
Microsoft Dynamics 365 for Finance and Operations has several convenient ways to view, edit and publish data. One convenient way is a feature that opens information in Excel. This feature uses some out-of-the-box Excel templates.
If the standard Excel template does not meet your requirements, then the template needs to be modified. It is best to keep the standard one untouched and create a new entry template.
The standard Excel templates can be accessed from Organization Administration → Setup → Office → Integration → Document Templates. There is a download option to access the actual template file.
In this article, we will need to make some modifications for General Ledger Journal, since the out of the box template only shows the Main Account value, rather than the entire financial dimensions.
If we just need to show the dimension as they see on D365 UI, then we need to remove the Main Account column and add the Financial Dimension column as it is in the UI.
Here is the screenshot for the issue: Open in Excel does not show the entire financial dimension.
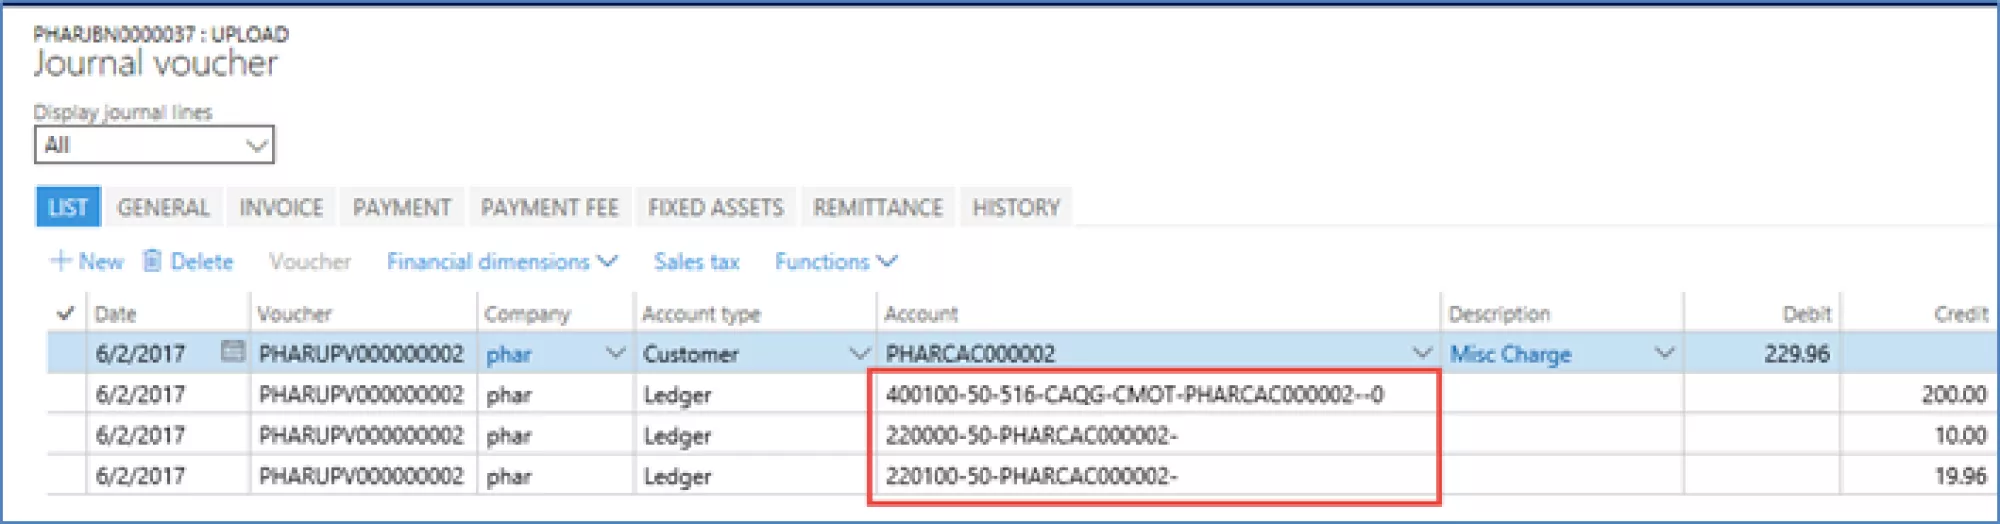
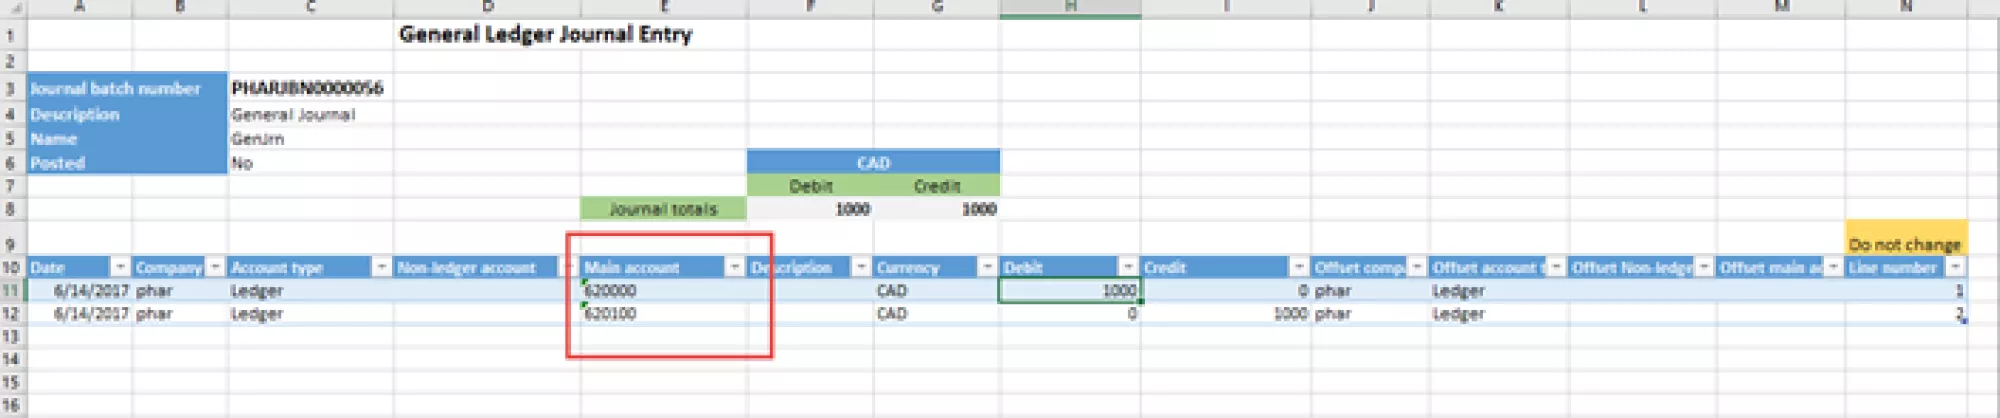
Note: You can also use the Visual Studio → Dynamics365 → Addins → Add financial dimensions to Odata option to seperate the financial dimensions to Odata option to seperate the financial dimensions into different columns, but the user may not want that since they have to do extra steps to add these new columns to spreadsheet and rearrange the columns. Get more details about this here.
How to customize the General Ledger Journal
1. Open the standard Excel template and make modifications.
Save it in a local path. In our example, for the General Ledger Journal Excel template (LedgerJournalLineEntryTemplate), the dimension column in D365O only shows the Main Account in the Excel template. We will download and modify the template and save it to a local path. Here's how this is done:
- Go to Organization administration→ Setup→ Office integration→ Document templates, find the LedgerJournalLineEntryTemplate and download it
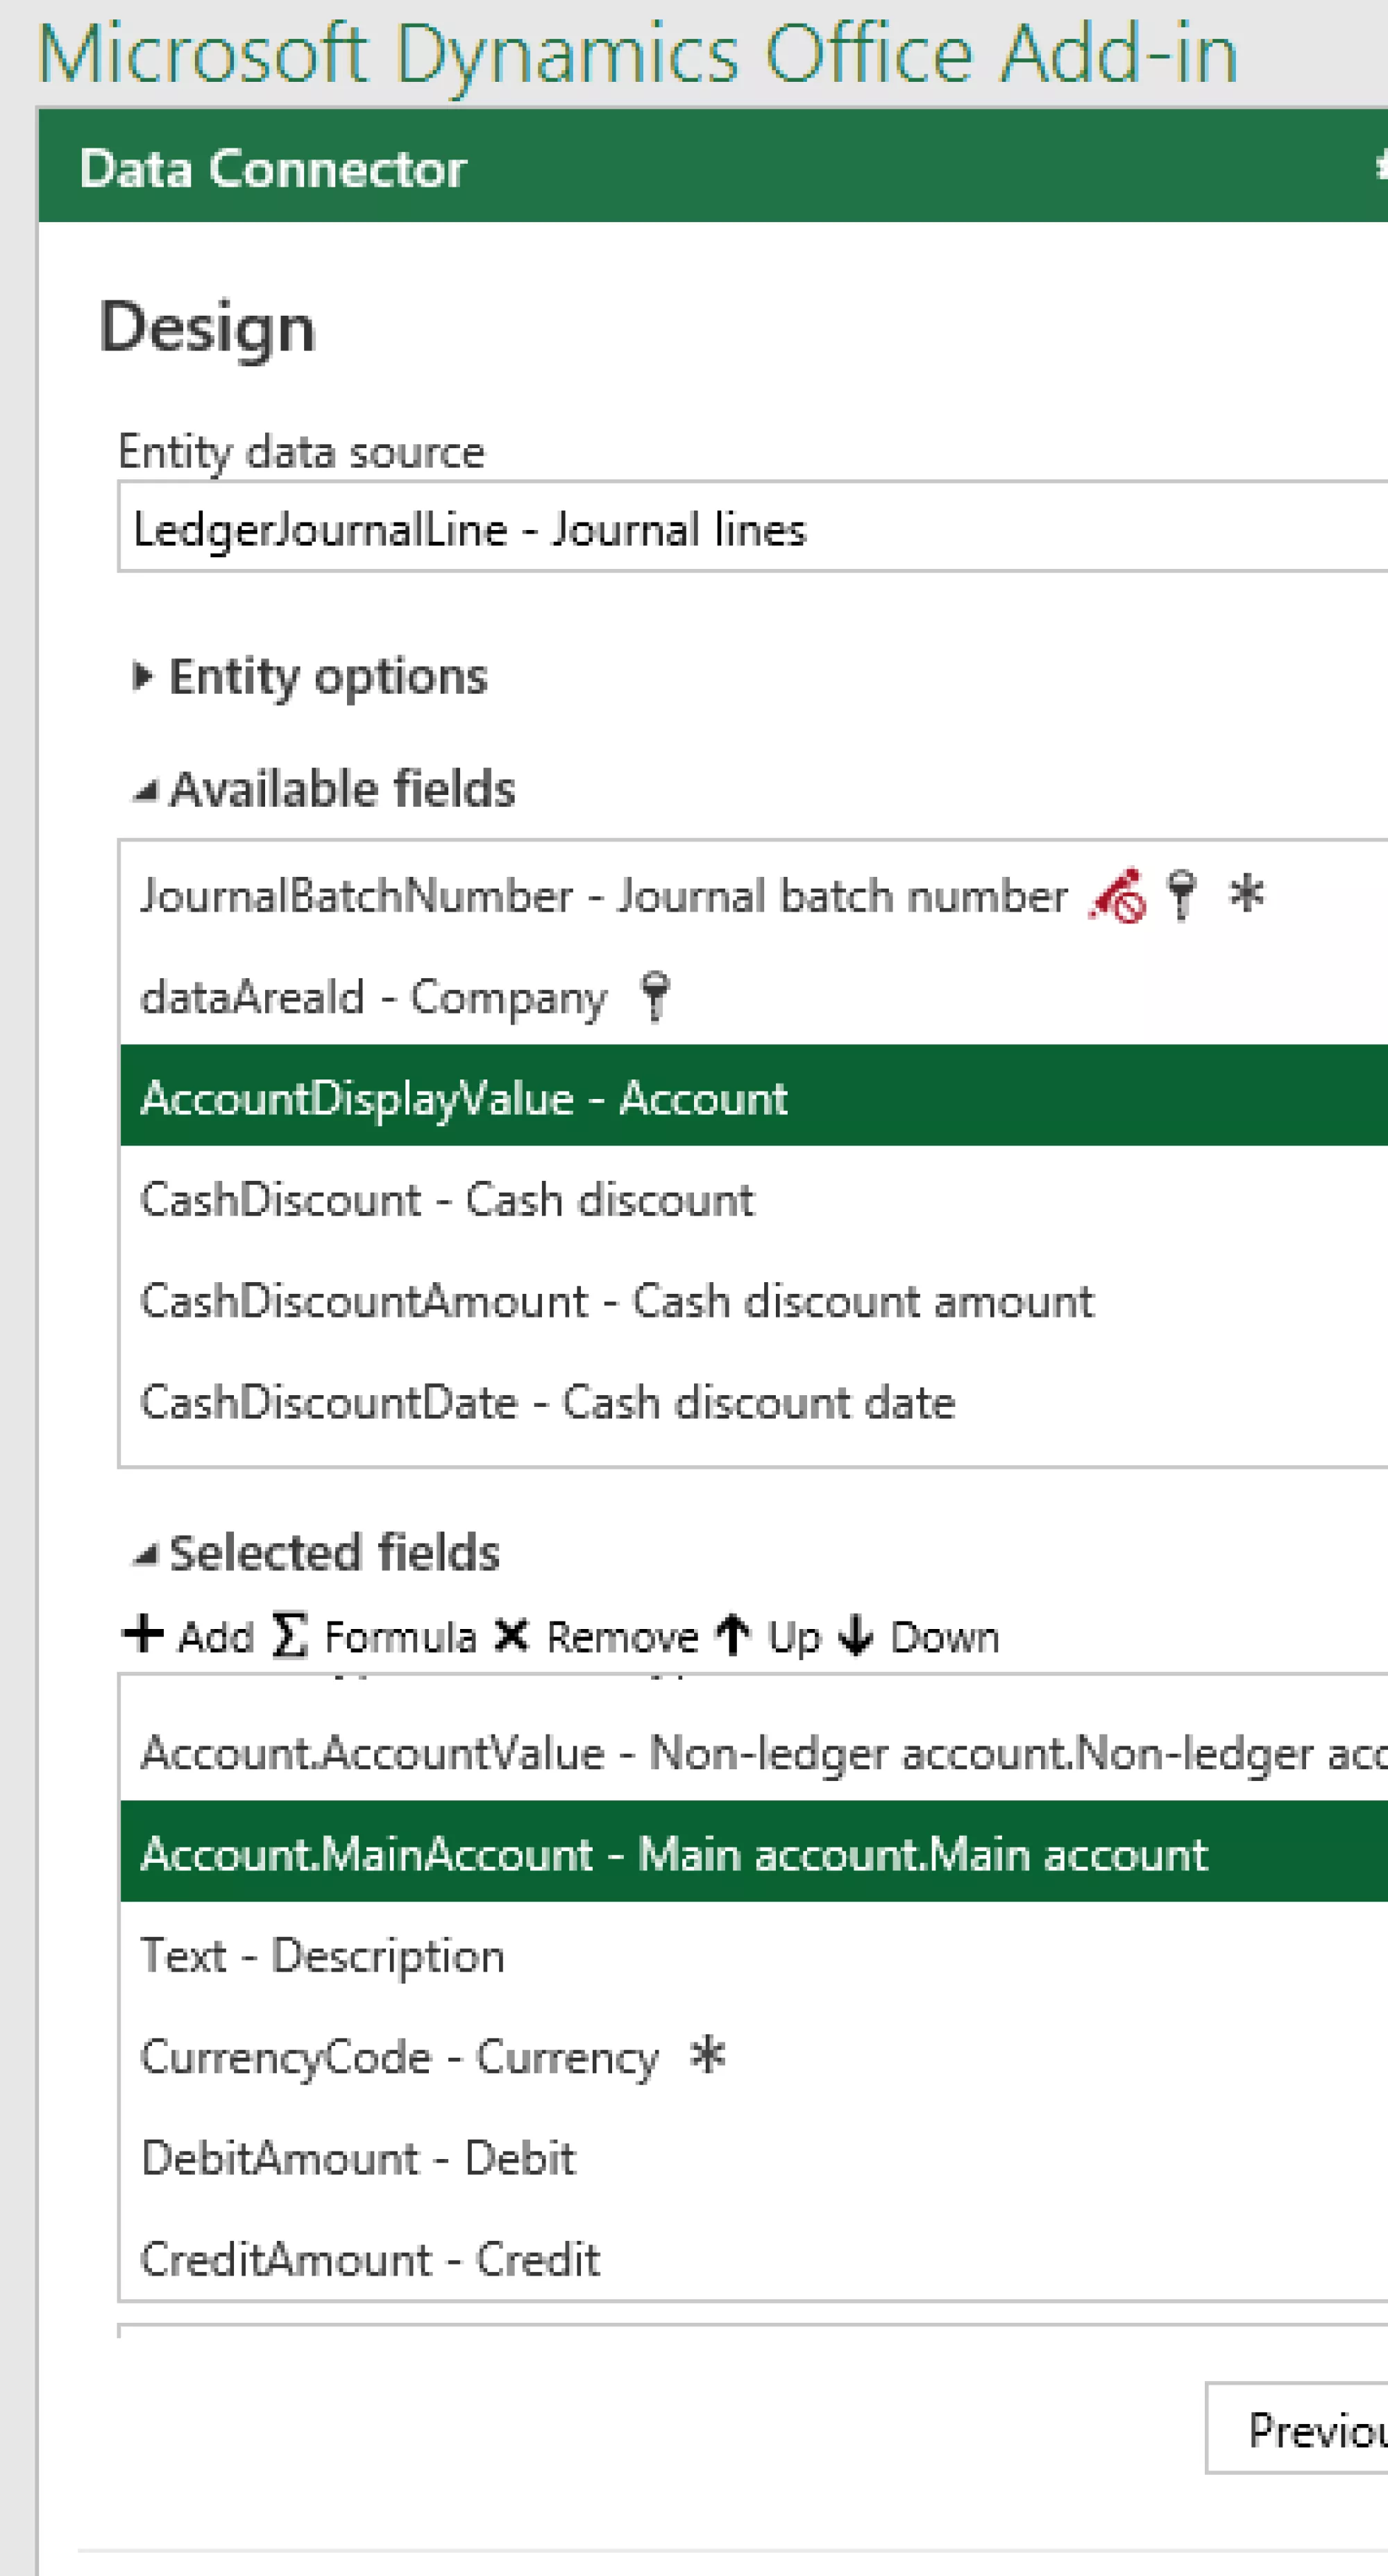
- In the Microsoft Dynamics Office Add-in, click the Design button
- Select to edit LedgerJournalLine data source
- In the selected fields grid, remove Account.AccountValue - Main account.Main account.
- In the Available fields grid, select AccountDisplayValue - Account.
- Click update
- Save the modified version to a local path.
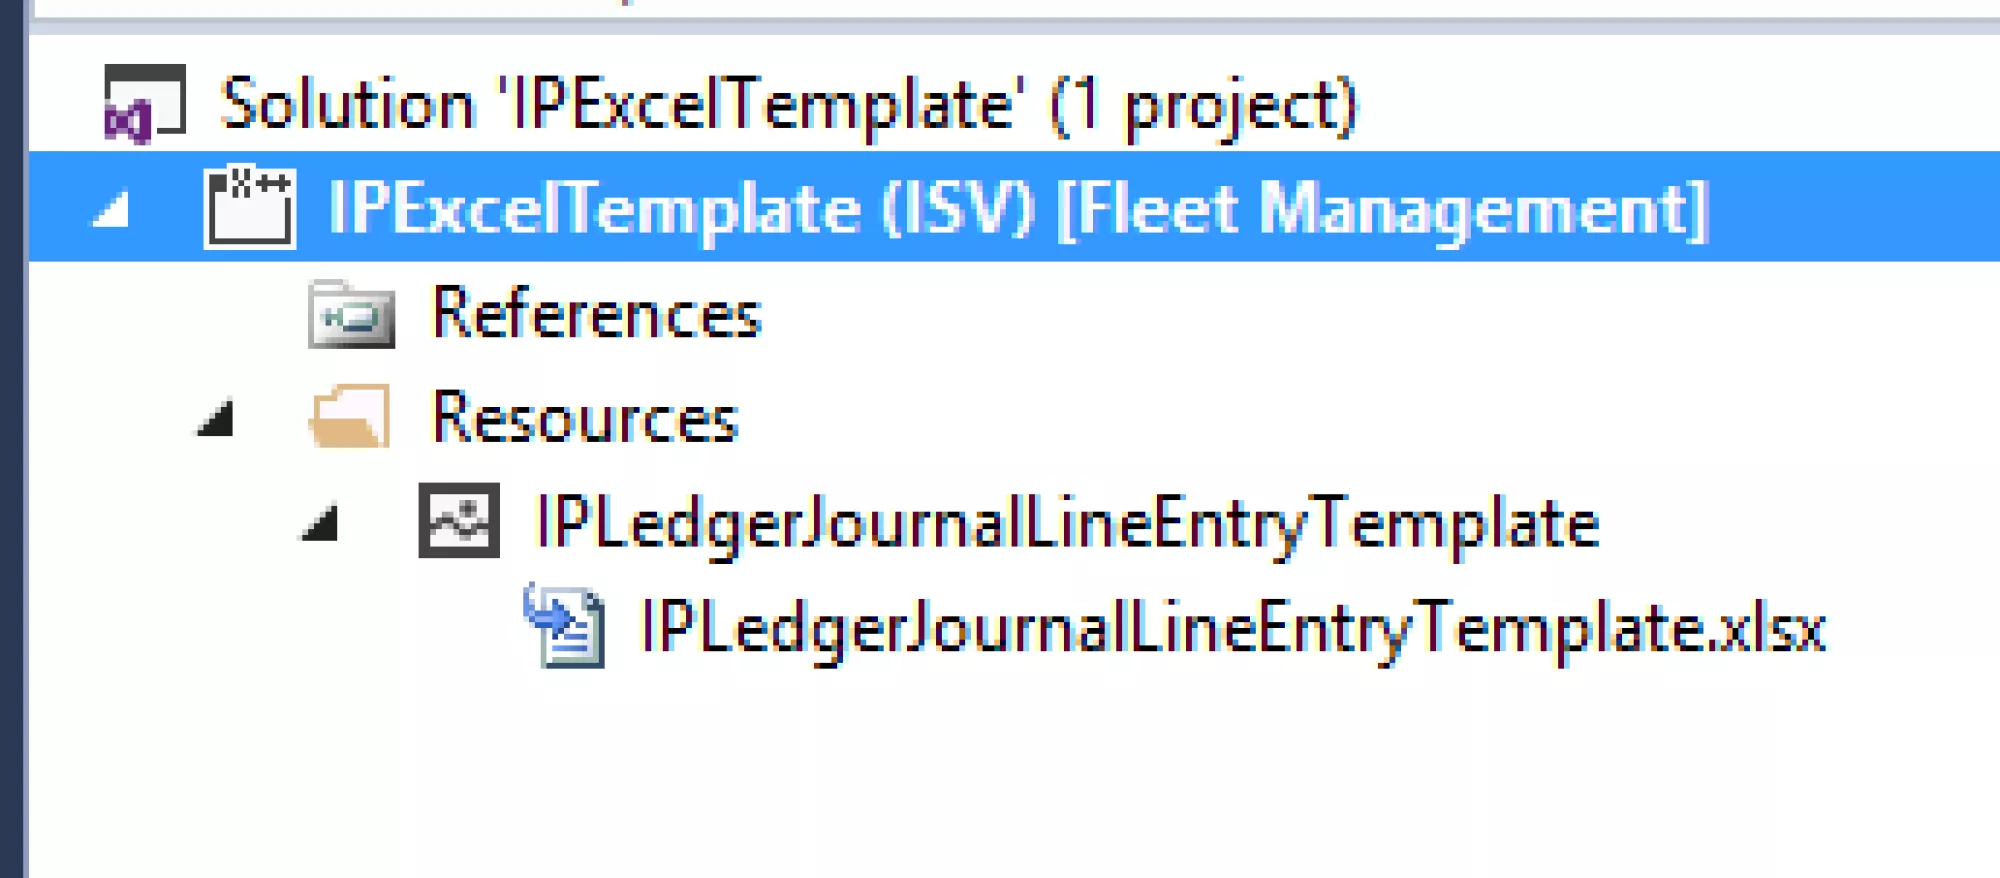
2. In Visual Studio, create a new project and add a Resource to the project
Point the Resource to the new saved Excel in the local path.
3. Create a new class to extend DocuTemplateRegistrationBase class and implement LedgerIJournalExcelTemplate.
Note: The DocuTemplateRegistrationBase class will look through all the child classes to populate the Document templates in D365O. The LedgerIJournalExcelTemplate in the interface that has the framework.
Copy all the logics from LedgerDailyJournalExcelTemplate class. This is the class for the standard General Ledger Journal Entry template. We just need to change the template name and label, as shown below:
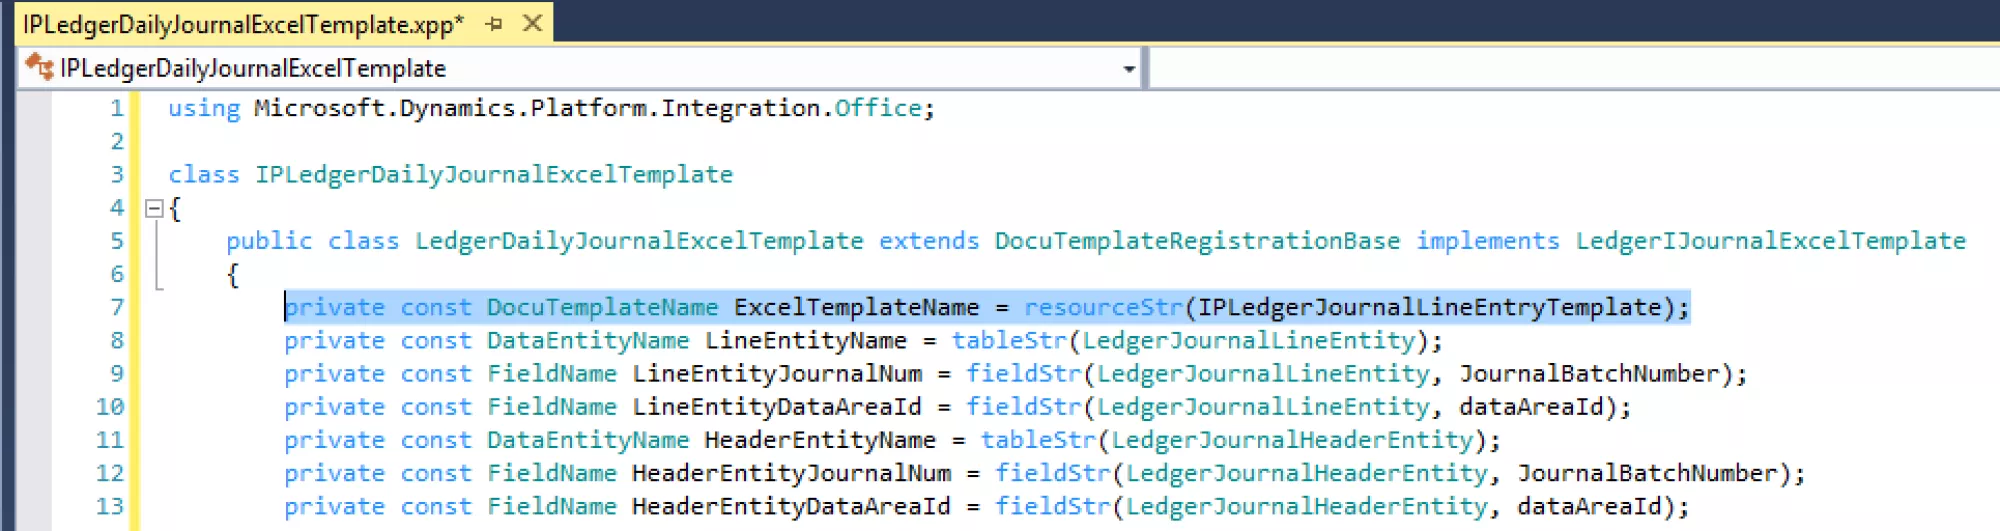
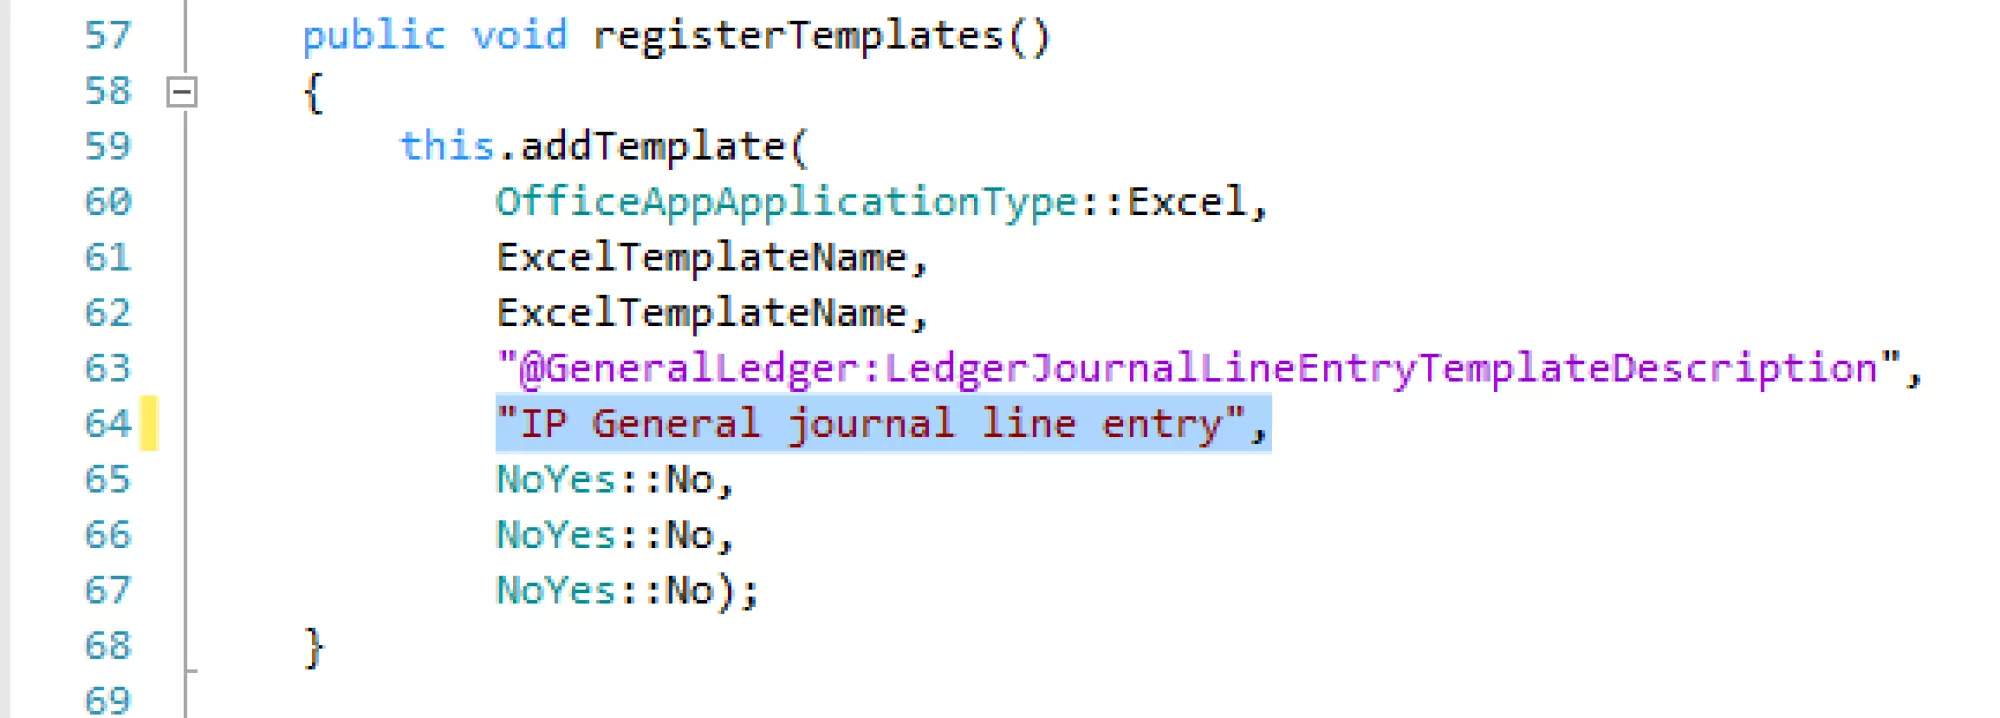
4. Build the project.
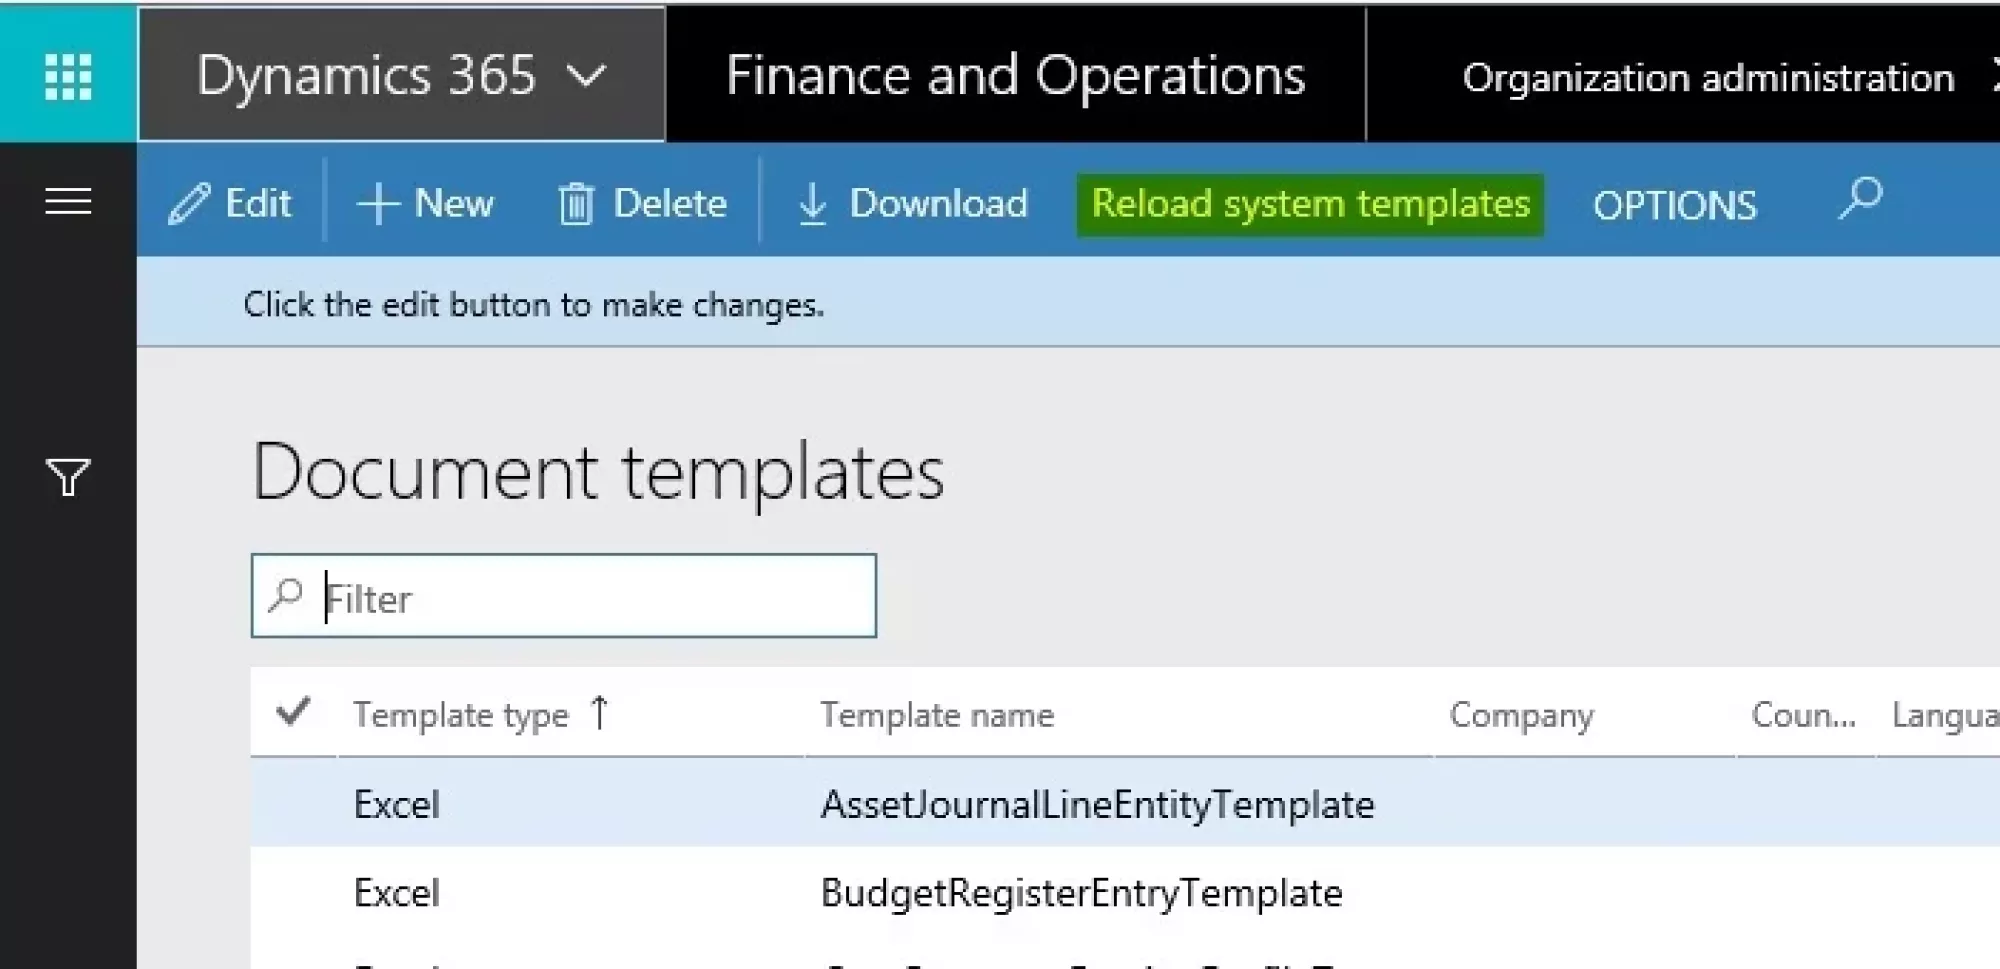
5. Reload system templates
Go to D365O→ Organization administration→ Setup→ Office integration→ Document templates. Click "Reload system templates". You will see the new template is added to the list.
6. Test your new ledger
To test, go to General Ledger -> Journal entries -> General journals -> Open lines in Excel. You can see the new template entry is added.
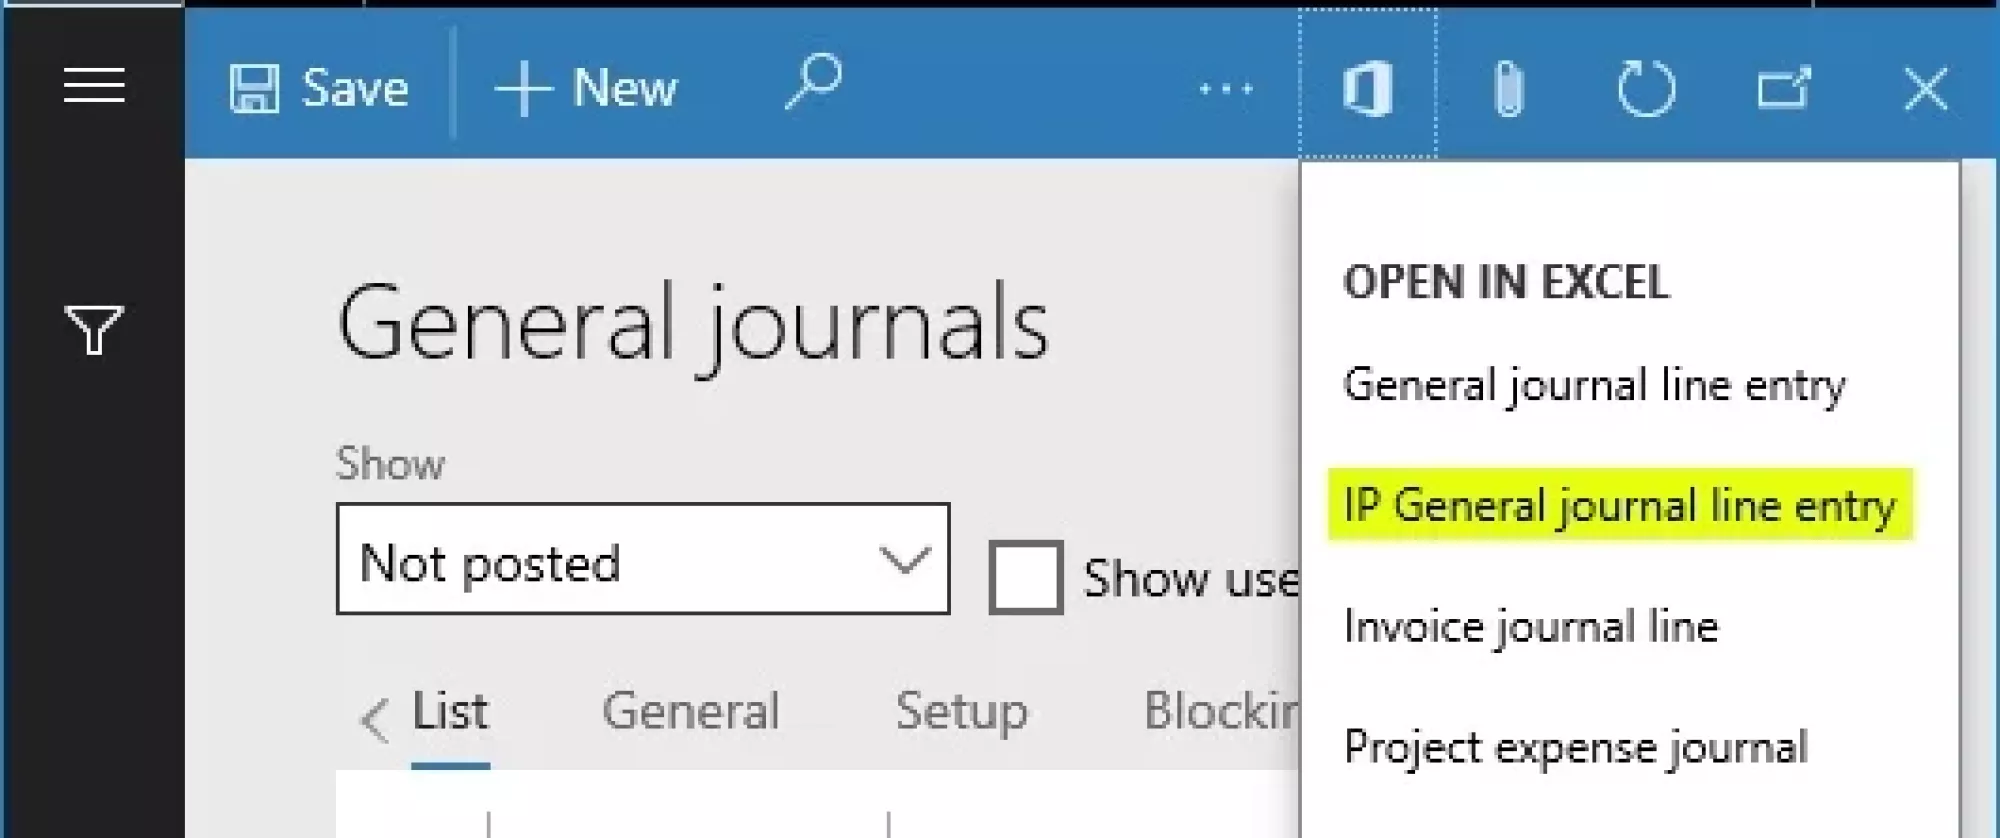
When open in Excel, the new Account column is showing the entire financial dimension now.
